|
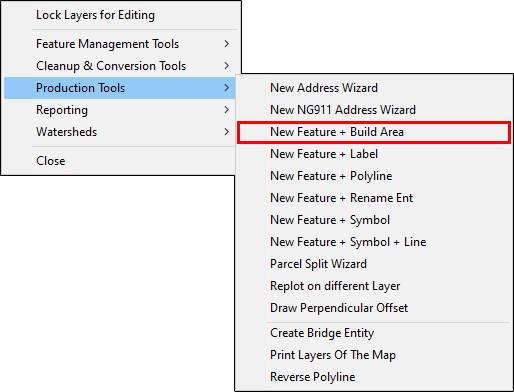
New Feature + Build Area |
This wizard automates the Build Area (See this page to see configuration details.) tool, located on Tools Menu > Show Map Editing Tools > Advanced Tools > Production Tools, by combining it with the New Ftr and Place Label (Optional) buttons to form a single procedure.
Running this procedure:
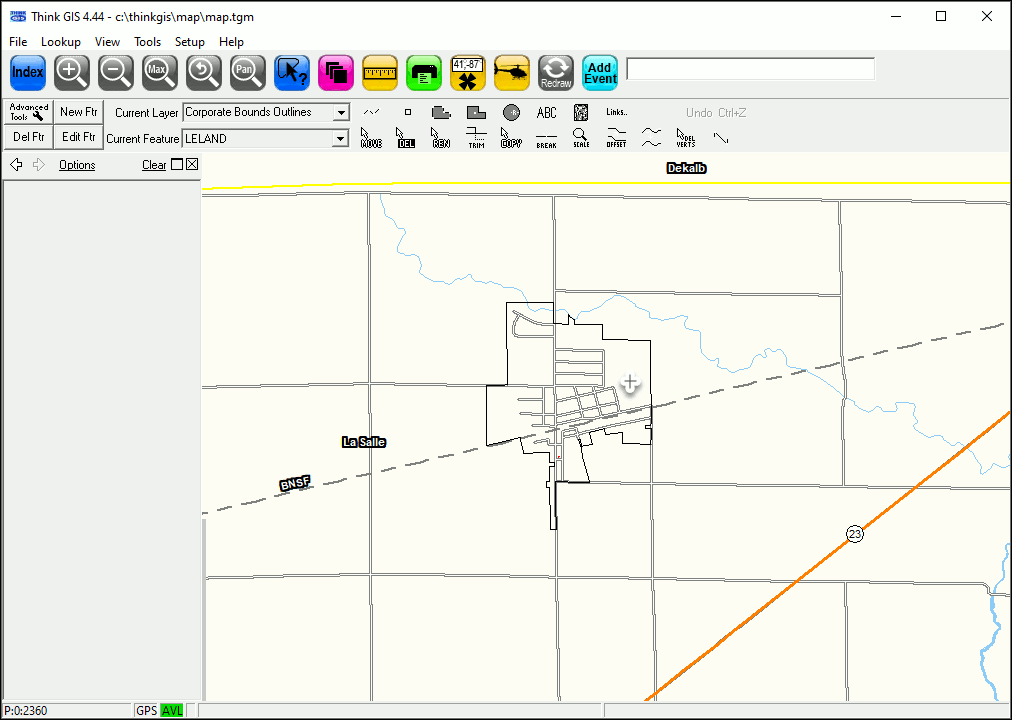
1) Lock the desired layers for editing, zoom to the location of the new structure, and then select this tool from the Production Tools menu.
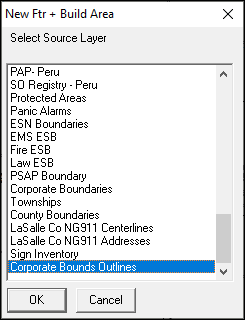
2) If this is the first time running this tool since starting Think GIS, setup configuration is required. Once the tool has been configured, it will retain the settings unless either the user opts to change them or Think GIS is closed. Select the Source Layer, the layer to use for the polyline outline, and then click OK.
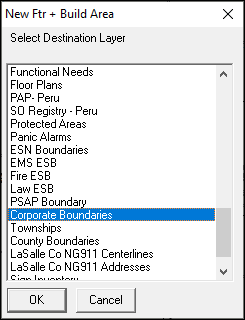
3) Select the Destination Layer, the layer to contain the newly created area, and then click OK.
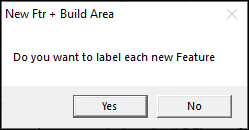
4) To place a label entity, select Yes on this prompt. Labels may be automatically shown by using the Auto Label column in Layer Settings. If this latter option is desired, click No on the prompt. (WTH recommends clicking No.)
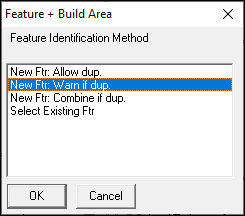
5) Determine how best to manage duplicate features.
•New Ftr: Allow dup.= This option will create a duplicate feature using the existing duplicate feature.
•New Ftr: Warn if dup.= This option will pop up a notice that a feature with the same Feature Name already exists in the layer. (WTH recommends using this option, if unsure.)
•New Ftr: Combine if dup.= This option will automatically combine a duplicate Feature Name with the existing feature. The result will be a single feature in the layer with multiple entities on the map.
•Select Existing Ftr= This option will simply use the existing feature that the input Feature Name is duplicating.
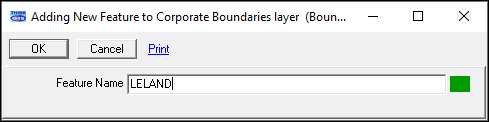
6) Type the name of the new feature information in the Feature Form, and then click OK.
7) Click inside of the polyline representing the area outline. As soon as this step is complete, the tool will return to step 6 to start again with a new feature. Press Esc or click Cancel on the Feature Form displayed to finish this process.
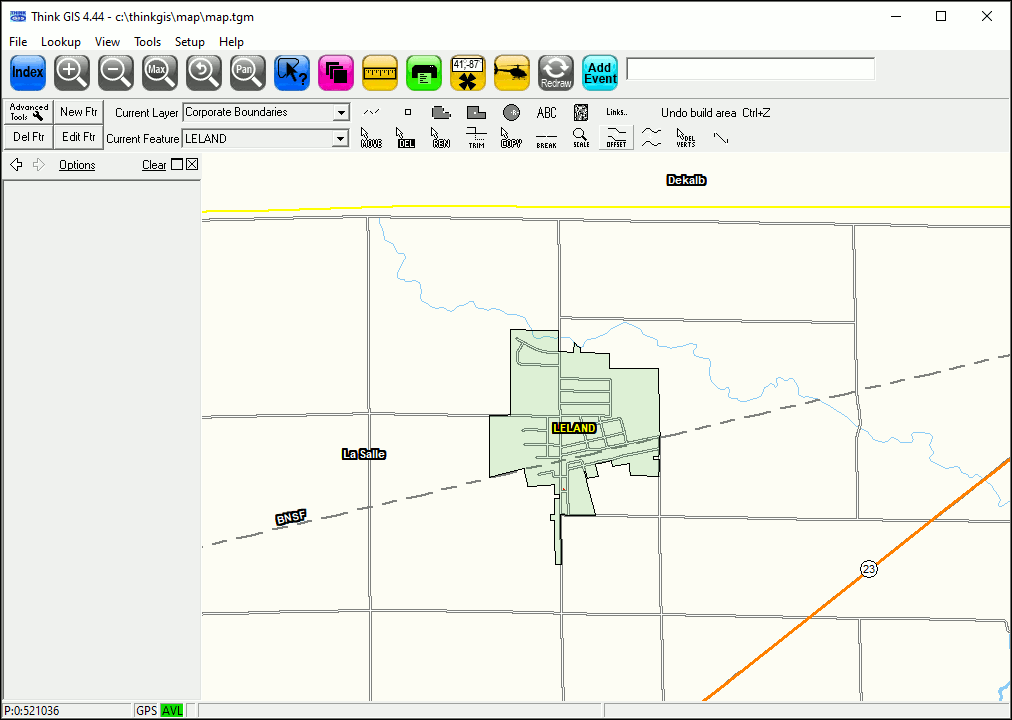
8) The area will now display on the selected destination layer.
Notes:
•Some data in the feature form may be automatically generated due to the field settings. See Layer Format for information.
•It is usually necessary to run the breaking routine on the source layer before running this procedure.
•See other similar tools on the Production Tools menu.
•Tool use instructions will also appear in the footer of the Think GIS window in the Instructional Bar.
|
Copyright © 2026 WTH Technology |