|
Categorize Layer |
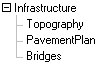
Layer Categories help users manage a long list of layers by grouping similar layers together. A complex map consisting of 50+ layers, for example, can be collapsed into just 5 or 10 categories. Users can choose to display or hide the contents of each category reducing the amount of information on the screen.
Layer Categories only affect the appearance of the Index and Layer Settings screens. No other functionality within Think GIS is affected by how layers are grouped.
To create a category
1) Right click on any uncategorized layer and select "Categorize Layer" from the menu on the right.
2) Type the name of the category to be created, and then click "OK."
3) Other layers may now be dragged and dropped into the new category (see instructions below).
To move layers into or out of categories
•Simply click and hold down the left mouse button while over the gray box at the beginning of a row and drag it up or down to a new position in the list and then let go of the mouse button.
•An indented blue drop line indicates that the drop point is within a category.
•Categories as a whole can also be moved just like an individual layer.
o Categories cannot be dropped, or nested, inside of other categories.
•To remove a category simply drag all layers out of the category and the category will disappear.
Notes:
•Any commands or settings that use layer names as parameters work exactly the same for categorized layers as for uncategorized layers. For example, a Parcels layer is still simply referred to as "Parcels" even if it is grouped into a "Land" category. For this reason it is still important to keep all layer names unique even when they are in different categories.
•The title bar on Feature Form will display the category name in parenthesis to the right of the layer name.
|
Copyright © 2026 WTH Technology |