|
Fill Properties |
To change how Areas are filled in
1) Open the Layer Settings window.
2) Click in the "Fill" column for that layer.
3) Select the desired fill properties as described below.
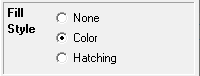
Fill Style
None Only the perimeter of each Area entity is drawn.
Color The interior of each area is filled with a solid color. See Fill Color properties below.
Hatch The interior of each area is filled with a hatch pattern. See Hatching properties below.
Fill Color Properties
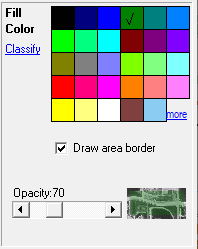
Color Select a color from the palette.
Opacity Use this setting to control the see-through-ability of the fill color. Slide this bar all the way to the right (value=255) to draw a solid color that is completely opaque. Slide this bar more to the left to make the fill color more translucent. The preview window will give an indication of the effect of this setting.
Classify Click this button to assign different fill colors to different features. All features will be drawn using the same Opacity value. See Classification for instructions on setting up or modifying classification rules. The sample below show what this screen looks like when classification is enabled.
Show Legend On Screen Check this box to see a legend on the main Think GIS display showing this fill color classifications. This option is completely independent of the legend displayed on printouts.
.png)
Hatch Properties
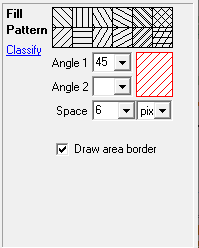
Patterns Choose one of the 12 predefined hatch patterns or define a unique one.
Angle1 The angle of the first hatch pattern or blank to indicate none.
Angle2 The angle of the second hatch pattern or blank to indicate none. If both angles are the same then the second line will be offset from the first a distance of 1/3rd the total line spacing.
Space The distance between parallel lines in each hatch pattern. This distance can be specified in feet or pixels.
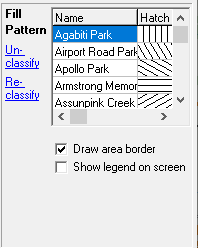
Classify Click this button to assign different hatch pattern to different features. See Classification for instructions on setting up or modifying classification rules. The sample below show what this screen looks like when classification is enabled.
Notes:
•Boundaries on the layer that will not fill in may be because the boundary lines were drawn as polyline entities rather than area entities.
•The line color, width, and style setup on the Line Properties screen controls how the perimeter of an area is drawn.
|
Copyright © 2026 WTH Technology |