|
Text Properties |
To change the color, font or other properties of all labels
1) Open the Layer Settings window.
2) Click in the "Text" column for that layer.
3) Select the desired text properties as shown in the samples below.
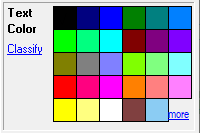
Text Color
Color Select a color from the palette to be used to draw all labels on this layer.
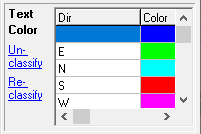
Classify Click this button to assign different text colors to different features. See Classification for instructions on setting up or modifying classification rules. The sample below show what this screen looks like when classification is enabled.
Text Font
.png)
Name Specify the name of any font installed on the computer.
Bold Check to draw all text as bold.
Italic Check to draw all text as italic.
Underline Check to draw all text as underlined.
Shadow Check to draw a background around the text. This effect can make text easier to read when displayed on top of aerial photography or other complex backgrounds.
Draw Hwy Shield Check this for features on this layer to be labeled using a highway shield. The size of the shield is controlled by font height but the shield colors are fixed. See shield labeling rules below.
Label Format
Click on the interactive image below for more information.
Shield Labeling Rules - Simple
For a dedicated highways layer in which every feature should be labeled using a shield, check the "Draw Hwy Shield" checkbox and Think GIS will automatically determine the shield type and text per the following rules:
•If the label text starts with an "I" then an Interstate symbol is used.
•If the label text starts with a "U" then a US highway shield is used.
•If the label text starts with a "C" then a county highway shield is used.
•If the label text starts with an "S" or any other letter then a circle shield is used.
•The text that appears inside the shield comes from the fields defined in the label format, however, only the portion of the label occurring after the last space is drawn inside the shield. For example if the label text is "US HWY 24" then "24" is shown on the shield.
•If there is no space in the label then the label will start at the first number. For example "I70" would show as "70."
•The size of the shield is controlled by font height but the shield colors are fixed.
Shield Labeling Rules - Advanced
A road layer where some but not all features should be labeled with shields will need a couple special fields added to the layer for it to work correctly.
•Add a "Shield Type" field to indicate the shield type, if any, to use for each feature. 'I'=Interstate, 'U'=us hwy, 'S'=state hwy, 'C'=County Hwy, anything else uses a circle.
•Add a "Shield Text" field that contains the exact text, if any, to be drawn inside the shield. Shields will only be drawn for features that have something entered in this field. If this field is blank then a normal text label will be used for this feature.
•When auto labeling is used with shields, users can control the scale at which shielded labels display independent of the scale at which non-shielded labels display for the same layer. This requires that a "Shield Text" field be setup for the layer as described above. When this field is present and the "Draw Hwy Shield" box is checked on this screen, users will see a "Max Shield Range" setting on the auto labeling setup screen.
Notes:
•See also Auto-Label Properties.
•The Label Format configuration may be up to 100 characters long.
•Field names must be enclosed in square brackets. Ex., [Pipe Size]
•Include any optional text or carriage returns before, between, or after the fields.
oOptional text outside of the square brackets will display regardless of the field having data or not. To ensure that optional text does not display in those cases, enclose it and the field, including square brackets, in curly brackets. Ex., {[Pipe Size]"}
|
Copyright © 2026 WTH Technology |
