|
Field Mapping Setup |
Mapping the values of one field to another may be necessary when altering a layer's setup in the Layer Format or when moving/copying features from one layer to another.
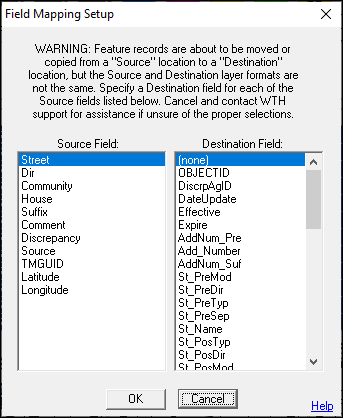
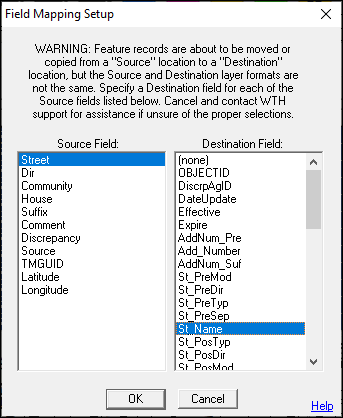
In this example, a standard address layer is being used as a source for a Next Generation 911 address layer. When copying the features from the source layer to the destination layer, the user will need to correctly map the Source Fields (fields from the layer being copied from) with the Destination Fields (fields from the layer being copied to). If a common field name is shared between the two layers, it will automatically map itself; however, this can be overridden by the user mapping the Source Field to a different Destination Field.

To map a source field to a new destination, simply select the Source Field in the left column, and then select a Destination Field in the right column.

Notes:
•If a Destination Field is selected more than once, it will be mapped to the last selected Source Field selected in conjunction with it.
•When mapping fields to another layer, it is important to confirm the destination layer has fields that are formatted similarly to avoid any data loss. For example, if copying a street name into another layer, be sure that the character length on the destination layer field is formatted with enough characters to accept the longest street name. This information may be determined by checking the Field Lengths in Layer Format or using the Diagnostic Information link to see a report of all character lengths for a given layer under the Field Usage section.
•If a TMGUID field is present in the Source but not the Destination layer, it is recommended that the action is canceled and a GUID field is first added to the Destination layer.
|
Copyright © 2025 WTH Technology |